Author: Dawid Adach
Earlier, we learned how to create the Event component. The problem is, that this component won’t be useful unless you can pass data to it, such as the time, title, location and description of the specific event we want to display. That's where inputs come into the picture.
In this lesson we will learn two different ways on how we can pass data to our component.
1. Passing Data using <ng-content>
The first way you pass data to our object is to use <ng-content> which allows us to render content between the tags. This can be achieved as follows:
- Update
event.component.html
with the following code: - Add some data in between the <app-event></app-event> tags in the
app.component.html
file: - Save the file and run the app
<ng-content></ng-content>
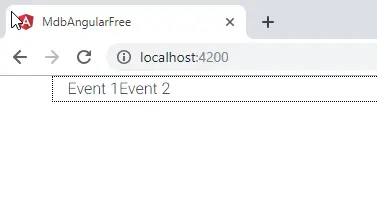
<div class="container">
<div class="row">
<div class="col-md-9">
<app-event>Event 1</app-event>
<app-event>Event 2</app-event>
</div>
<div class="col-md-3">
</div>
</div>
</div>

Great! But what if we want to pass more varied data? Let's learn how to pass multiple data to our component.
1. Passing Data using @Input
Child component (Event Component
)
- Import
Input
inevent.component.ts
(before we were importing onlyComponent
) - Define new
@Input()
variable within the EventComponent class: - Update the component template (
event.component.html
) to display ourvalue
variable:
import {Component, Input} from '@angular/core';
export class EventComponent {
@Input() value: any;
}
<p>{{ value }}</p>
Parent component (App Component
)
- Update the App template (
app.component.html
): - Save the files and run the project
<div class="container">
<div class="row">
<div class="col-md-9">
<app-event [value]="5" ></app-event>
<app-event [value]="'string'"></app-event>
</div>
<div class="col-md-3">
</div>
</div>
</div>

Using this method we can pass as many parameters as we need.
Note that the way we pass data from parent to the child component also matters.
[value]="5" // Value will be number
[value]="'string'" // Value will be string
[value="'5'"] // This also will be string (note '' )
We can also use @Input
to pass more complex structure.
Important:
Keep in mind that using @Input
allows us to pass data only in one direction - from the Parent
to the Child
component.
3. Passing complex objects
- Add an initial event object to the
app.component.ts
- Update the
App
template: - Update the
Event
template: - Save the files and run the project:
import { Component } from "@angular/core";
@Component({
selector: "app-root",
templateUrl: "./app.component.html",
styleUrls: ["./app.component.scss"]
})
export class AppComponent {
event: any =
{
time: "08:00",
subject: "Breakfast with Simon",
location: "Lounge Caffe",
description: "Discuss Q3 targets"
};
}
<div class="container">
<div class="row">
<div class="col-md-9">
<app-event [value]="event"></app-event>
</div>
<div class="col-md-3"></div>
</div>
</div>
<h1> {{value.time}} : {{value.location}} </h1>
<p> Location: {{value.location}} </p>
<p> Description: {{value.description}} </p>

As you can see, it's very easy to pass even a complex objects using above method.
Previous lesson Next lesson
Spread the word:
