Free UI/UX design course
Learn how to create exceptional designs by reading my new tutorial.
Start learningDeploy your project
You have created your first small project with MDB. Congratulations.
Now it's time to share it with the world!
In this lesson you will learn how, thanks to MDB GO, you can easily and free of charge publish and host your website on the Internet.
Step 1 - install Node.js
To run MDB command line (a.k.a. MDB CLI) on your computer you need Node.js.
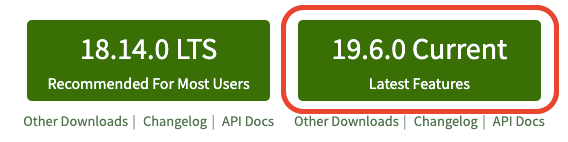
To install it go to the https://nodejs.org/ and click the button to download it.
You will see 2 buttons there - LTS on the left, and Current on the right. It does not really matter what version do you chose, but just to simply not to overthink it choose the version on the right ("Current").
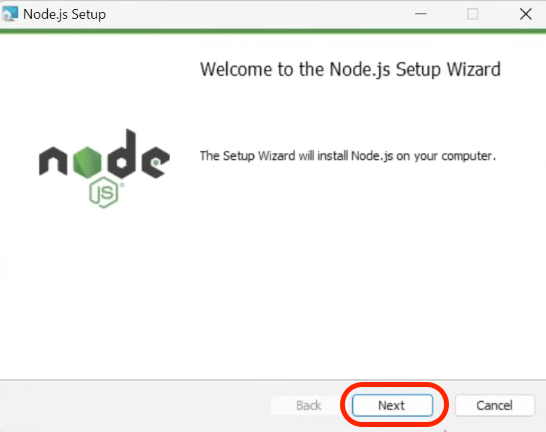
Once downloaded, run the file, accept the terms and just click "Next" until the installation is complete.
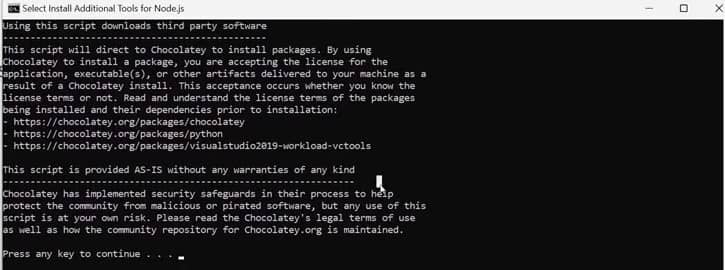
After the installation is complete, you can see the terminal window as in the screenshot below. Click any button to proceed.
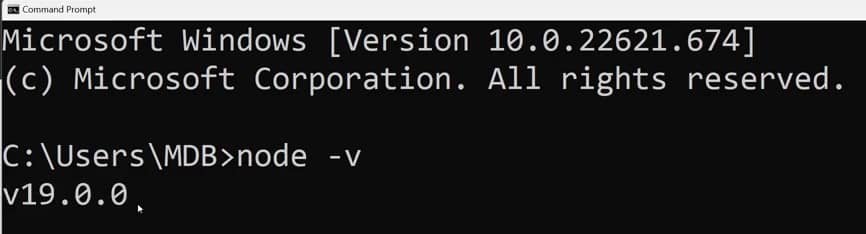
Now let's check if the installation was successful. Launch the terminal (if you are using Windows, type "cmd" in the system search and run Command Line app / on MacOS, search for the "terminal" application).
Then type node -v in the terminal and click enter. You should see the version of the installed node.js software like on the screen below (note your version may be different as an update may have come out since this tutorial was published).
Step 2 - create MDB account
To use MDB GO you need an MDB account. You can create them for free at this link.
It is best if you register using your email address. This will make it easier for you to use your account in the terminal afterwards.
Fill out the form, register and confirm your email address.
Step 3 - install MDB CLI
MDB CLI is a tool that will allow you to manage your projects and publish them to the Internet using a terminal on your computer.
Launch a terminal and enter the following command. Then confirm it by clicking enter.
npm install -g mdb-cli
Enter the mdb -v command in the terminal to check if the MDB CLI was installed correctly. If, like in the screenshot below, you see the version number (remember that it may differ) then everything is fine.

Step 4 - log in to the MDB account in the terminal
To log in to MDB GO, in the terminal type the mdb login command and press enter.
Then enter your username and password that you set when registering your MDB account.
Step 5 - rename the folder where your project is and navigate to it in terminal
We are almost ready to publish our project on the internet. There is only one small step left, which is very often overlooked by novice developers, which causes them a lot of frustration.
We just have to navigate in the terminal to the folder where we have our project saved.
In the previous lesson, I downloaded and unpacked the MDB package in my "Downloads" directory and worked on it in this location.
The original name of the downloaded package looks something like this:
MDB5-STANDARD-UI-KIT-Free-6.0.0
It's a long and complicated name that can cause some problems and difficulties to navigate. Change it to something simpler, such as:
mdb-tutorial
I moved this folder to my desktop and finally my project path looks like this ( by the way - I'm working on Windows):
C:\Users\MDB\Desktop\mdb-tutorial
Now open your terminal and type the command cd (it means going to the specified path) and paste the path to the folder where you have your project.
If you entered the correct path, you should see in the terminal that you have been moved to the selected location.

Step 6 - publish your project!
Alright, we're ready to go!
1. In the terminal, type mdb publish command and press enter. You will see the message:
Required .mdb file not found. Create? (Y/n)
Type the letter "Y" and click enter.
2. Then you will be asked for a name for your project. You can stick to mdb-tutorial if you like.
3. After that, you will be asked for the type of project. By default, the frontend option is selected and we will stay with it. So just click enter.
4. Next, you will be asked for the default package manager. Stay with the npm option and just hit enter again.
5. Then, you will be asked for a few things, such as a description of your project or its version. Ignore these questions and just hit enter on all of them until you see the final question Is this OK? (Yes). Click enter here as well. Then your project will start uploading.
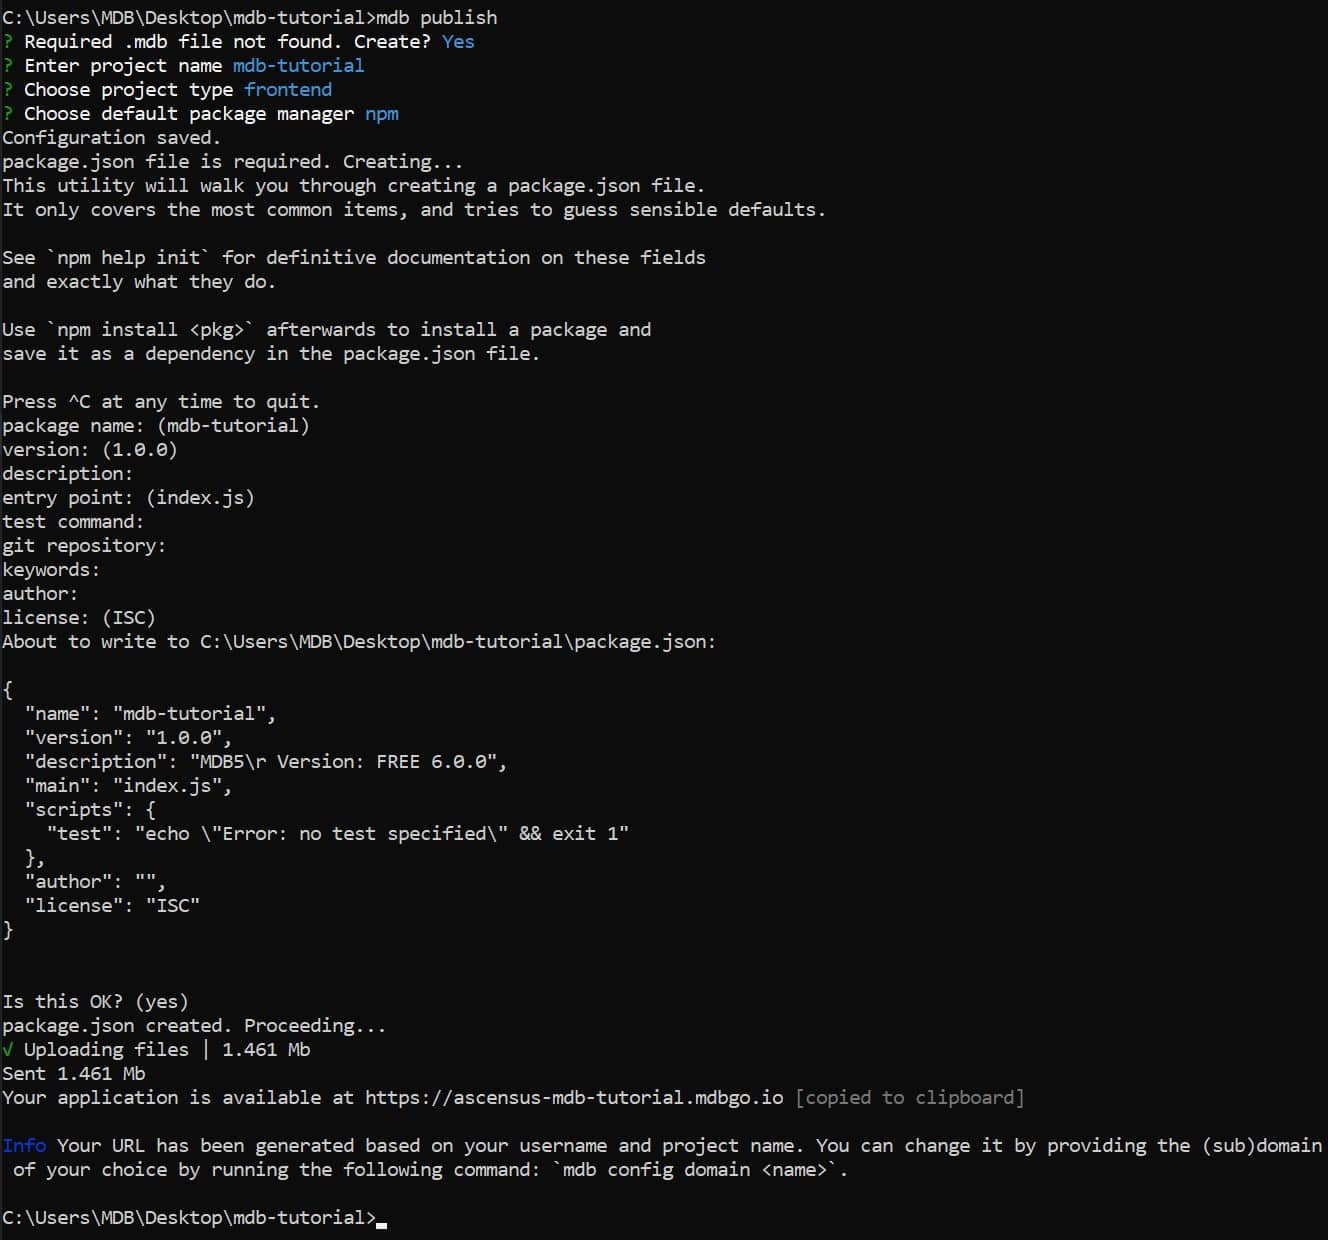
And it's ready! Your project is available at the link provided in the terminal.
This link is automatically copied to your clipboard, so you can immediately press ctrl + v and paste it into the search box in the browser.
Follow this link and admire your first MDB project available online worldwide!
For example, my project is available at:
https://ascensus-mdb-tutorial.mdbgo.io/

About author
Michal Szymanski
Co Founder at MDBootstrap / Listed in Forbes „30 under 30" / Open-source enthusiast / Dancer, nerd & book lover.
Author of hundreds of articles on programming, business, marketing and productivity. In the past, an educator working with troubled youth in orphanages and correctional facilities.