Free UI/UX design course
Learn how to create exceptional designs by reading my new tutorial.
Start learningAnimations
In this lesson we will learn how to add animations, such as fade, slide, zoom and many more.
Note: Animations are a feature available in the paid part of MDB, called MDB Pro. If you want to learn more about what you get with MDB Pro, click the button below.
MDB ProYou can use this special promo code to get 15% discount for MDB Pro:
C4B9MJES
If you are not interested in MDB Pro, feel free to skip this lesson. It is not necessary to complete the tutorial, so in this situation click "Next" and proceed.
MDB Pro gives you over 70 smooth and polished animations. Let's look at some of them.
Move the mouse over the squares below to launch the animation.
How to add an animation
The easiest way to implement the animation is to use data-mdb-attributes.
In the example
below, we use the icon
<i class="fas fa-car-side fa-3x"></i>
and add the attributes
data-mdb-animation-init data-mdb-animation-reset="true"
      data-mdb-animation="slide-out-right"
to give it animation on click.
data-mdb-animation-initis an obligatory attribute for each animation.data-mdb-animation-reset="true"lets you decide if the animation can be repeateddata-mdb-animation="slide-right"lets you specify which animation apply to the element. In the demo section above you can find available animations.
      <i
        data-mdb-animation-init
        data-mdb-animation-reset="true"
        data-mdb-animation="slide-right"
        class="fas fa-car-side fa-3x">
      </i>
Click the car to start the animation.
You can easily change the animation by updating the data-mdb-animation attribute. Look at the list of animations at the beginning of the lesson. In each square you have an animation name that you can use in the mentioned attribute. Let's change the car's animation from slight-right to tada.
        <i
          data-mdb-animation-init
          data-mdb-animation-reset="true"
          data-mdb-animation="tada"
          class="fas fa-car-side fa-3x">
        </i>
Click the car to start the animation.
Launch options
There are several options for launching the animation.
On click
Animation on click is a default launching option, so it does not require
any additional data-mdb-attribute.
        <i
          data-mdb-animation-init
          data-mdb-animation-reset="true"
          data-mdb-animation="slide-right"
          class="fas fa-car-side fa-3x">
        </i>
On hover
Use data-mdb-animation-start="onHover" to launch the animation on mouse hover.
        <i
          data-mdb-animation-init
          data-mdb-animation-start="onHover"
          data-mdb-animation-reset="true"
          data-mdb-animation="slide-right"
          class="fas fa-car-side fa-3x"
        ></i>
On Load
Use data-mdb-animation-start="onLoad" to start the animation after loading the
page. Refresh your browser to see this effect.
        <i
          data-mdb-animation-init
          data-mdb-animation="zoom-in"
          data-mdb-animation-start="onLoad"
          class="fas fa-car-side fa-3x"
        ></i>
On scroll
Use data-mdb-animation-start="onScroll" to launch the animation when you scroll
the page and reach the element.
Notice that the animation will launch only once - even if you reach it when scrolling multiple times.
        <i
          data-mdb-animation-init
          data-mdb-animation-start="onScroll"
          data-mdb-animation="slide-in-left"
          class="fas fa-car-side fa-3x"
        ></i>
Other options
Animations have a lot of useful options and we won't be able to talk through them all in this lesson. However, we will touch on 2 more of them - delay and offset.
data-mdb-animation-delay option
Thanks to this, you can define (in milliseconds) with what delay the animation should start. This is extremely useful when creating larger compositions, which we will use in our portfolio.
Add the data-mdb-animation-delay="500" attribute to the element with the animation, and the animation will start after 500 milliseconds (0.5 seconds):
        <i
          data-mdb-animation-init
          data-mdb-animation-reset="true"
          data-mdb-animation="slide-right"
          data-mdb-animation-delay="500"
          class="fas fa-car-side fa-3x">
        </i>
Click the car to start the animation with a delay.
data-mdb-animation-offset option
With scroll animation, the animation starts as soon as the first pixel of the element to which we added the animation appears on the screen. This is not always desirable and in the case of large elements (such as our photo in the About me section) it may prevent us from seeing the animation. That is why in such situations the offset option is useful, which allows us to define how many pixels from the beginning of the element to which we added the animation we still need to scroll for the animation to start.
Add the data-mdb-animation-offset="200" attribute to the element with the animation, and the animation will start after you scroll 200 more pixels:
            <i
            data-mdb-animation-init
            data-mdb-animation-reset="true"
            data-mdb-animation="slide-right"
            data-mdb-animation-start="onScroll"
            data-mdb-animation-offset="200"
            class="fas fa-car-side fa-3x">
          </i>
The car will appear after you scroll 200 more pixels down from here
Alright, let's use this knowledge to apply animations to your portfolio!
Step 1 - add animations on load to the Split screen section
Our Split screen section is visible immediately after loading, so it makes sense to add an onLoad animation to its elements.
Let's add a fade-in animation to the headlines and CTA elements. Let's also add a little delay so that the items load one by one instead of all at once:
<!-- Section: Split screen -->
<section class="">
<div class="container-fluid px-0">
<div class="row gx-0">
<!-- First column -->
<div class="col-lg-6 vh-100 d-flex flex-column justify-content-center align-items-center">
<!-- Headings -->
<div class="h-100 d-flex justify-content-center align-items-center px-5">
<div class="">
<h2 class="display-4"
data-mdb-animation-init
data-mdb-animation-start="onLoad"
data-mdb-animation="fade-in"
data-mdb-animation-show-on-load="false"
data-mdb-animation-delay="200">
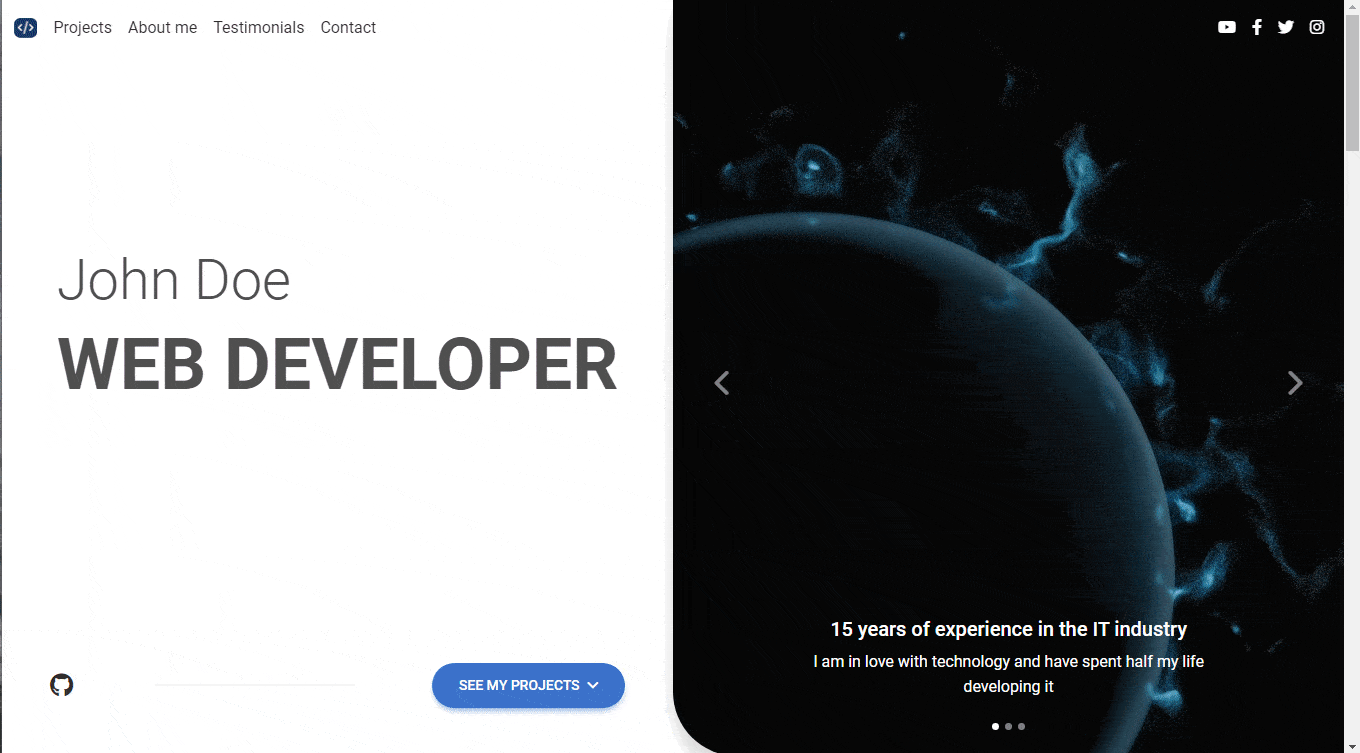
John Doe</h2>
<h1 class="display-2 fw-bold text-uppercase"
data-mdb-animation-init
data-mdb-animation-start="onLoad"
data-mdb-animation="fade-in"
data-mdb-animation-show-on-load="false"
data-mdb-animation-delay="400">Web developer</h1>
</div>
</div>
<!-- CTA elements -->
<div class="d-flex align-items-center w-100 justify-content-between px-5 mb-5"
data-mdb-animation-init
data-mdb-animation-start="onLoad"
data-mdb-animation="fade-in"
data-mdb-animation-show-on-load="false"
data-mdb-animation-delay="600">
<a href="https://github.com/mdbootstrap/mdb-ui-kit" target="_blank" class="text-dark"><i
class="fab fa-github fa-xl"></i></a>
<hr class="hr d-none d-xl-flex" style="height: 2px; width: 200px;">
<a class="btn btn-primary btn-lg btn-rounded" href="#" role="button">See my projects<i
class="fas fa-angle-down ms-2"></i></a>
</div>
</div>
<!-- First column -->
[...]
</div>
</div>
</section>
<!-- Section: Split screen -->
Nice, isn't it?

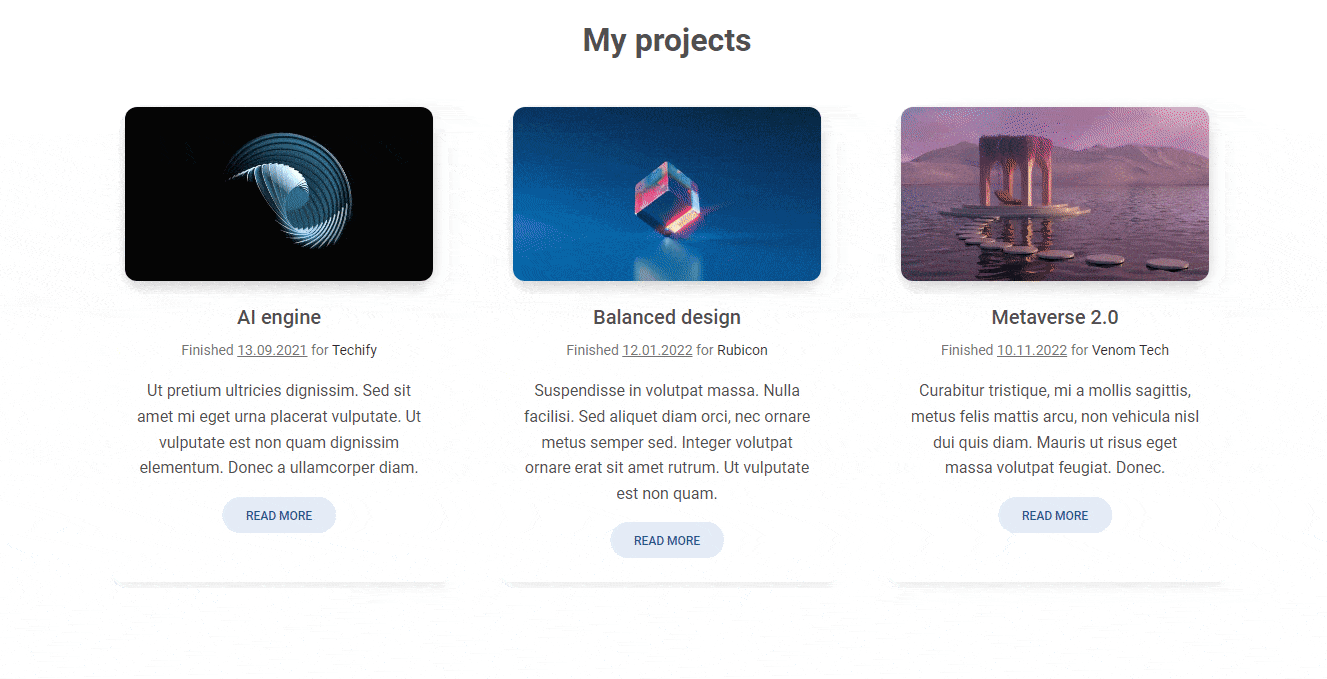
Step 2 - add animations on scroll to the My projects section
In the My projects section, let's add an animation with a delay of 200 milliseconds to each card. This time we'll use an onScroll animation to make the card appear one by one as we scroll down the page:
      <!-- Section: My projects -->
      <section class="mb-10 text-center">
        <h2 class="fw-bold mb-7 text-center">My projects</h2>

        <div class="row gx-lg-5">

          <!-- First column -->
          <div class="col-lg-4 col-md-12 mb-6 mb-lg-0">

            <div class="card rounded-6 h-100"
                 data-mdb-animation-init
                 data-mdb-animation-start="onScroll"
                 data-mdb-animation="fade-in"
                 data-mdb-animation-show-on-load="false"
                 data-mdb-animation-delay="200">

              [...]

            </div>

          </div>
          <!-- First column -->

          <!-- Second column -->
          <div class="col-lg-4 mb-6 mb-lg-0">

            <div class="card rounded-6 h-100"
                 data-mdb-animation-init
                 data-mdb-animation-start="onScroll"
                 data-mdb-animation="fade-in"
                 data-mdb-animation-show-on-load="false"
                 data-mdb-animation-delay="400">

              [...]

            </div>

          </div>
          <!-- Second column -->

          <!-- Third column -->
          <div class="col-lg-4 mb-6 mb-lg-0">

            <div class="card rounded-6 h-100"
                 data-mdb-animation-init
                 data-mdb-animation-start="onScroll"
                 data-mdb-animation="fade-in"
                 data-mdb-animation-show-on-load="false"
                 data-mdb-animation-delay="600">

              [...]

            </div>

          </div>
          <!-- Third column -->

        </div>

      </section>
      <!-- Section: My projects -->
Step 3 - add animations on scroll to the About me section
In this section, we will need the offset option mentioned earlier, because the photo on the right is large, so without it, the animation would launch and we would only see its top.
So let's add onScroll animations, and add the offset option (value 300) to the photo in the right column:
      <!-- Section: About me -->
      <section class="mb-10">

        <div class="container">

          <div class="row gx-0 align-items-center">

            <!-- Firt column -->
            <div class="col-lg-6 mb-5 mb-lg-0">

              <div style="background: hsla(0, 0%, 100%, 0.55);
                          backdrop-filter: blur(30px);
                          z-index: 1;"
                          class="card rounded-7 me-lg-n5"
                          data-mdb-animation-init
                          data-mdb-animation-start="onScroll"
                          data-mdb-animation="fade-in"
                          data-mdb-animation-show-on-load="false"
                          data-mdb-animation-delay="600">

                  [...]

              </div>

            </div>
            <!-- Firt column -->

            <!-- Second column -->
            <div class="col-lg-6 mb-5 mb-lg-0">

              <div class="bg-image hover-overlay rounded-7 shadow-4 rotate-lg"
                   data-mdb-animation-init
                   data-mdb-animation-start="onScroll"
                   data-mdb-animation="fade-in"
                   data-mdb-animation-show-on-load="false"
                   data-mdb-animation-delay="200"
                   data-mdb-animation-offset="300">
                <img src="https://mdbootstrap.com/img/new/standard/people/272.jpg" class="w-100" alt="" />

                  [...]

              </div>

            </div>
            <!-- Second column -->

          </div>

        </div>

      </section>
      <!-- Section: About me -->
Step 4 - add the rest of the animations
Ok, I think you get the point. Add animations you like to the rest of the sections. Experiment with different configurations and options. Also see the animations documentation page and the API tab where you will see all the available options and try to apply some of them to your project.

About author
Michal Szymanski
Co Founder at MDBootstrap / Listed in Forbes „30 under 30" / Open-source enthusiast / Dancer, nerd & book lover.
Author of hundreds of articles on programming, business, marketing and productivity. In the past, an educator working with troubled youth in orphanages and correctional facilities.