Free UI/UX design course
Learn how to create exceptional designs by reading my new tutorial.
Start learningVite - installation and setup
To be able to use all the advanced functionalities mentioned in the previous lesson, we need to use a dedicated build tool.
Build tools can be quite complicated and can cause a lot of trouble with installation and configuration. That is why MDB has prepared Starters (i.e. predefined templates with ready-to-use configuration) for the three most popular build tools:
We also mentioned that in this tutorial we will use the Vite starter, because it is currently considered the fastest and easiest build tool to use. Let's start.
Note: During this tutorial, we will be using the MDB CLI, which is a powerful and free code management and deployment tool.
If you've done the previous tutorials, you should already have the MDB CLI installed. However, if not, go to this lesson and follow the MDB CLI installation instructions.
Step 1 - Launch the terminal and download Vite starter via MDB CLI
In the terminal, navigate to the location where you want to place the Vite starter (I chose the desktop) by typing cd + destination path.
Then enter the command:
mdb init
There will be different starters and templates to choose from. Click the down arrow to scroll through the options. Select Standard + Vite and hit enter.
The latest version of the starter will download to your computer.
You didn't even have to go to the documentation page, look for a download link, and wonder which version to download. Comfortable, right?
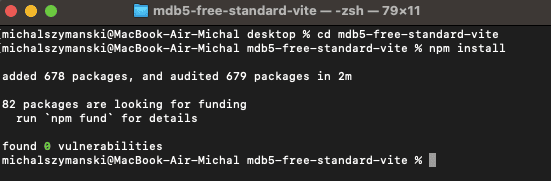
Step 2 - Install dependencies
In the terminal, navigate to the folder where you downloaded the Vite starter:
cd mdb5-free-standard-vite
Then install all dependencies by typing the following command in the terminal:
npm install
The installation of any necessary dependencies begins. This may take some time (depending on your internet speed, even several minutes).
If all goes well, you should see something like this in your terminal:
Step 3 - Launch Vite
In the terminal, type the following command:
npm start
Vite will start a local server and give you a link in the terminal where a live preview of your new project will be available.
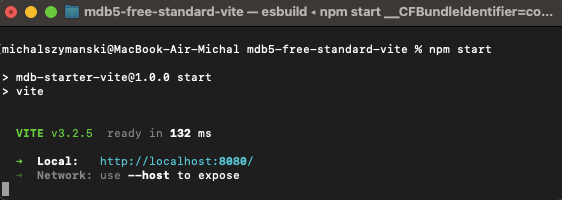
Most likely this link will be http://localhost:8080/ .
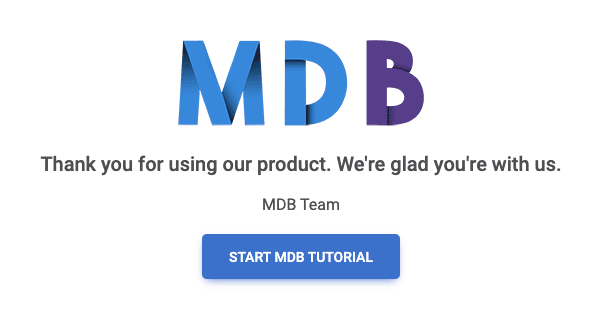
Open it in your browser. You should see a welcome message.
Now open the entire folder in the code editor (I use Visual Studio Code editor and recommend it to you too).
Then go to the src/index.html and change some text in the welcome message. After saving the file, you will notice that the browser automatically refreshes and your live preview has been updated with your changes. This is a very useful feature, thanks to which you do not have to refresh the browser after saving every change in the code - Vite will do it for you.
That's all for this lesson. If something doesn't work as it should or is unclear to you, don't hesitate to hit me up on twitter 😉

About author
Michal Szymanski
Co Founder at MDBootstrap / Listed in Forbes „30 under 30" / Open-source enthusiast / Dancer, nerd & book lover.
Author of hundreds of articles on programming, business, marketing and productivity. In the past, an educator working with troubled youth in orphanages and correctional facilities.