Free UI/UX design course
Learn how to create exceptional designs by reading my new tutorial.
Start learningElevation
To explain the elevation concept, let me quote from the official Material Design documentation:
- One surface at 1dp elevation and another surface at 8dp elevation, as viewed from the front
- The difference in elevation between the two surfaces is 7dp, as viewed from the side

Let's use the above knowledge and create a new Testimonials section in our project.
Step 1 - add a new Testimonials section
Add a new, empty Testimonials section, with a 3-column grid inside:
        <!-- Section: Testimonials -->
        <section class="mb-10 text-center">

          <h2 class="fw-bold mb-7 text-center">Happy clients</h2>

          <div class="row gx-lg-5">

            <!-- First column -->
            <div class="col-lg-4 mb-5 mb-lg-0">

            </div>
            <!-- First column -->

            <!-- Second column -->
            <div class="col-lg-4 mb-5 mb-lg-0">

            </div>
            <!-- Second column -->

            <!-- Third column -->
            <div class="col-lg-4">

            </div>
            <!-- Third column -->

          </div>
        </section>
        <!-- Section: Testimonials -->
Step 2 - add testimonials
Add a testimonial to each column.
There's nothing here that we haven't covered in previous lessons, so I won't dwell on it.
      <!-- Section: Testimonials -->
      <section class="mb-10 text-center">

        <h2 class="fw-bold mb-7 text-center">Happy clients</h2>

        <div class="row gx-lg-5">

          <!-- First column -->
          <div class="col-lg-4 mb-5 mb-lg-0">

            <div>
              <div class="rounded-7 p-4" style="background-color: hsl(218, 62.2%, 95%)">
                <p class="text-muted mt-4 mb-2">Project Manager at Spotify</p>
                <p class="h5 mb-4 text-primary">Garry Lindman</p>
                <p class="pb-4 mb-4">
                  Lorem ipsum dolor sit amet consectetur adipisicing elit. Facilis molestias quidem
                  itaque earum tempora distinctio soluta ut, eius, impedit porro iure praesentium
                  ratione possimus quos suscipit, ratione nostrum cum odit.
                </p>
              </div>
              <img src="https://mdbootstrap.com/img/new/avatars/22.jpg" class="w-100 rounded-7 mt-n5"
                style="max-width: 100px" alt="Avatar" />
            </div>

          </div>
          <!-- First column -->

          <!-- Second column -->
          <div class="col-lg-4 mb-5 mb-lg-0">

            <div>
              <div class="rounded-7 p-4" style="background-color: hsl(218, 62.2%, 95%)">
                <p class="text-muted mt-4 mb-2">CEO at Reddit</p>
                <p class="h5 mb-4 text-primary">Lisa Montessori</p>
                <p class="pb-4 mb-4">
                  Et harum quidem rerum facilis est et expedita distinctio. Nam libero tempore, cum
                  soluta nobis est eligendi optio cumque nihil impedit quo minus id quod maxime
                  placeat facere possimus, omnis voluptas assumenda est omnis.
                </p>
              </div>
              <img src="https://mdbootstrap.com/img/new/avatars/11.jpg" class="w-100 rounded-7 mt-n5"
                style="max-width: 100px" alt="Avatar" />
            </div>

          </div>
          <!-- Second column -->

          <!-- Third column -->
          <div class="col-lg-4">

            <div>
              <div class="rounded-7 p-4" style="background-color: hsl(218, 62.2%, 95%)">
                <p class="text-muted mt-4 mb-2">Senior Product Designer at Twitter</p>
                <p class="h5 mb-4 text-primary">Ozzy McRyan</p>
                <p class="pb-4 mb-4">
                  Temporibus autem quibusdam et aut officiis debitis aut rerum necessitatibus saepe
                  eveniet ut et voluptates repudiandae sint et molestiae non recusandae. Itaque
                  earum rerum hic tenetur a sapiente delectus ut aut reiciendis.
                </p>
              </div>
              <img src="https://mdbootstrap.com/img/new/avatars/25.jpg" class="w-100 rounded-7 mt-n5"
                style="max-width: 100px" alt="Avatar" />
            </div>

          </div>
          <!-- Third column -->

        </div>
      </section>
      <!-- Section: Testimonials -->

Step 3 - add elevation
To ensure the correct elevation, we must first determine which element of our testimonial card will be closer to the surface and which will be further away.
CEO at Reddit
Lisa Montessori
Et harum quidem rerum facilis est et expedita distinctio. Nam libero tempore, cum soluta nobis est eligendi optio cumque nihil impedit quo minus id quod maxime placeat facere possimus, omnis voluptas assumenda est omnis.
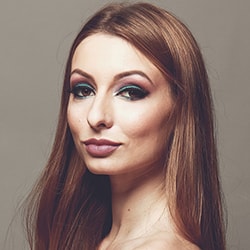
Since this image overlaps the blue card, it will be the one that will be farther from the surface. So, according to the theory of elevation and the laws of physics, the shadow of the photo will be more dispersed and farther from the element that casts it (i.e. the photo), and the shadow of the card will be smaller and more dense.
CEO at Reddit
Lisa Montessori
Et harum quidem rerum facilis est et expedita distinctio. Nam libero tempore, cum soluta nobis est eligendi optio cumque nihil impedit quo minus id quod maxime placeat facere possimus, omnis voluptas assumenda est omnis.
In the previous tutorial, we already learned about shadows in the MDB, so you know how to add and modify them.
In the current case, we can add a medium-level regular shadow to the card using the shadow-3 class, and a stronger and more diffused shadow to the photo using the shadow-5-strong class:
    <div>
      <div class="shadow-3 rounded-7 p-4" style="background-color: hsl(218, 62.2%, 95%)">
        <p class="text-muted mt-4 mb-2">CEO at Reddit</p>
        <p class="h5 mb-4 text-primary">Lisa Montessori</p>
        <p class="pb-4 mb-4">
          Et harum quidem rerum facilis est et expedita distinctio. Nam libero tempore, cum
          soluta nobis est eligendi optio cumque nihil impedit quo minus id quod maxime
          placeat facere possimus, omnis voluptas assumenda est omnis.
        </p>
      </div>
      <img src="https://mdbootstrap.com/img/new/avatars/11.jpg" class="shadow-5-strong w-100 rounded-7 mt-n5"
        style="max-width: 100px" alt="Avatar" />
    </div>
Step 4 - add shadows to the rest of the testimonials
Now that we know what to do to achieve the desired effect, all we have to do is add shadows to the rest of the testimonials:
      <!-- Section: Testimonials -->
      <section class="mb-10 text-center">

        <h2 class="fw-bold mb-7 text-center">Happy clients</h2>

        <div class="row gx-lg-5">

          <!-- First column -->
          <div class="col-lg-4 mb-5 mb-lg-0">

            <div>
              <div class="rounded-7 p-4 shadow-3" style="background-color: hsl(218, 62.2%, 95%)">
                <p class="text-muted mt-4 mb-2">Project Manager at Spotify</p>
                <p class="h5 mb-4 text-primary">Garry Lindman</p>
                <p class="pb-4 mb-4">
                  Lorem ipsum dolor sit amet consectetur adipisicing elit. Facilis molestias quidem
                  itaque earum tempora distinctio soluta ut, eius, impedit porro iure praesentium
                  ratione possimus quos suscipit, ratione nostrum cum odit.
                </p>
              </div>
              <img src="https://mdbootstrap.com/img/new/avatars/22.jpg" class="w-100 rounded-7 mt-n5 shadow-5-strong"
                style="max-width: 100px" alt="Avatar" />
            </div>

          </div>
          <!-- First column -->

          <!-- Second column -->
          <div class="col-lg-4 mb-5 mb-lg-0">

            <div>
              <div class="rounded-7 p-4 shadow-3" style="background-color: hsl(218, 62.2%, 95%)">
                <p class="text-muted mt-4 mb-2">CEO at Reddit</p>
                <p class="h5 mb-4 text-primary">Lisa Montessori</p>
                <p class="pb-4 mb-4">
                  Et harum quidem rerum facilis est et expedita distinctio. Nam libero tempore, cum
                  soluta nobis est eligendi optio cumque nihil impedit quo minus id quod maxime
                  placeat facere possimus, omnis voluptas assumenda est omnis.
                </p>
              </div>
              <img src="https://mdbootstrap.com/img/new/avatars/11.jpg" class="w-100 rounded-7 mt-n5 shadow-5-strong"
                style="max-width: 100px" alt="Avatar" />
            </div>

          </div>
          <!-- Second column -->

          <!-- Third column -->
          <div class="col-lg-4">

            <div>
              <div class="rounded-7 p-4 shadow-3" style="background-color: hsl(218, 62.2%, 95%)">
                <p class="text-muted mt-4 mb-2">Senior Product Designer at Twitter</p>
                <p class="h5 mb-4 text-primary">Ozzy McRyan</p>
                <p class="pb-4 mb-4">
                  Temporibus autem quibusdam et aut officiis debitis aut rerum necessitatibus saepe
                  eveniet ut et voluptates repudiandae sint et molestiae non recusandae. Itaque
                  earum rerum hic tenetur a sapiente delectus ut aut reiciendis.
                </p>
              </div>
              <img src="https://mdbootstrap.com/img/new/avatars/25.jpg" class="w-100 rounded-7 mt-n5 shadow-5-strong"
                style="max-width: 100px" alt="Avatar" />
            </div>

          </div>
          <!-- Third column -->

        </div>
      </section>
      <!-- Section: Testimonials -->


About author
Michal Szymanski
Co Founder at MDBootstrap / Listed in Forbes „30 under 30" / Open-source enthusiast / Dancer, nerd & book lover.
Author of hundreds of articles on programming, business, marketing and productivity. In the past, an educator working with troubled youth in orphanages and correctional facilities.